



Experimental Design for Fecal Proteomics Studies
Comparative fecal proteomics starts with a clear research question. Disease-versus-control studies, treatment comparisons, and longitudinal studies use different group structures and sample relationships. The study design should define the main comparison before sample numbers and proteomics methods are selected.
A practical plan connects the research question, study groups, biological replicates, sample size, analysis strategy, collection consistency, and analytical batches. Each decision should support the same primary comparison.
Define the Research Question
1. Identify the Primary Biological Comparison
The primary comparison identifies the biological conditions being compared. Common examples include disease versus control, treated versus untreated, baseline versus post-treatment, and comparisons across defined time points or experimental conditions.
Define the comparison before finalizing sample numbers. “Evaluate treatment effects” is too broad to guide the design. The study should specify whether the main comparison is between treated and untreated subjects or between paired samples collected from the same subjects before and after treatment.
2. Define the Protein-Level Outcome
The research question should also specify what type of proteomic change will be evaluated. Depending on the study, the outcome may be:
- differences in relative protein abundance between biological groups;
- changes in protein profiles before and after an intervention;
- protein patterns associated with different experimental conditions or time points.
Fecal proteomics can reveal differences in protein abundance and protein profiles across study groups. For guidance on choosing host-derived proteins, microbial-derived proteins, or both as the analytical focus, see Host and Microbial Protein Profiles in Fecal Proteomics.
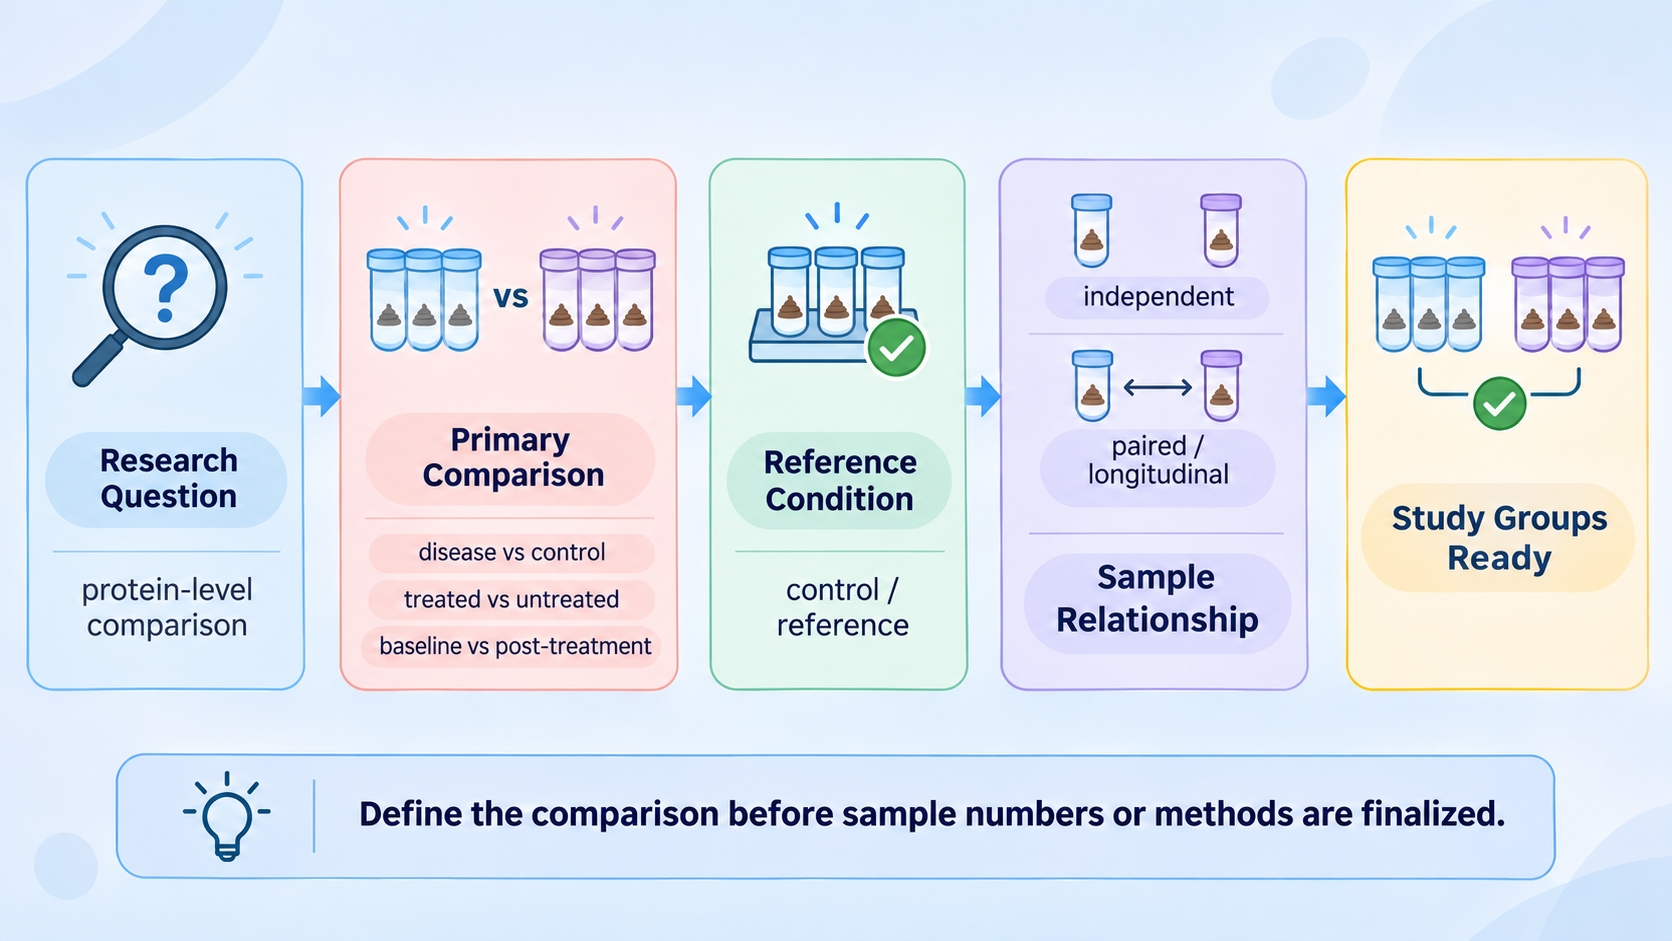
Figure 1. Defining the primary comparison and study-group structure in fecal proteomics experimental design.
Define Study Groups and Comparisons
1. Set the Primary Groups and Reference Condition
Assign each group a defined biological condition and select a reference group that fits the research question. For time-course, dose-response, and multi-group studies, specify the primary comparison and list secondary contrasts separately before analysis.
|
Study structure |
Primary comparison |
Key design point |
|
Disease vs. control |
Disease vs. reference group |
Reference group should represent the relevant biological baseline |
|
Treatment study |
Treated vs. untreated |
Treatment should not be confounded with another major group difference |
|
Paired study |
Before vs. after within the same subject |
Samples are linked, not independent |
|
Time-course study |
Defined time-point contrasts |
Subject ID and sampling time must remain traceable |
|
Multi-group study |
Predefined primary contrast |
Secondary comparisons should not obscure the main question |
2. Preserve Paired and Longitudinal Sample Relationships
Repeated fecal samples from the same participant or animal retain a clear biological relationship. Baseline and post-treatment samples form a paired comparison, while samples collected from the same subject at multiple time points form a longitudinal design.
Track subject or animal IDs, sampling time points, and paired-sample relationships throughout the project. The statistical analysis should follow the sample relationships defined by the study design.
3. Separate Primary and Secondary Factors in Multi-Group Studies
Studies involving treatment, disease status, dose, or time may include several biological factors. Identify the factor that addresses the main research question and record the secondary factors separately.For each sample, record:
- biological condition;
- subject or animal identity when samples are linked;
- the comparison in which the sample will be used.
Consistent group labels keep each comparison clear. After defining the groups and time points, apply the same collection and handling plan across groups. See Fecal Proteomics Sample Requirements, Collection, and Handling for sample collection, storage, and submission requirements.
Plan Biological Replicates and Sample Size
1. Identify the Independent Biological Units
(1) Biological replicates
One independent participant, animal, or experimental unit represents one biological replicate. Biological replicates provide the independent observations used to assess protein-level differences across biological units.
(2) Technical replicates
A technical replicate is a repeated preparation or LC-MS/MS measurement of the same fecal specimen. Technical replicates measure analytical variation; the biological replicate count remains unchanged. For example, three measurements of one specimen represent one biological sample.
2. Plan Sample Size Around the Primary Comparison
The required number of biological replicates varies by study. Plan sample size according to the primary comparison and the number of independent biological units available.Consider four factors when planning sample size:
- biological variation: greater between-subject variation generally requires more independent observations;
- expected effect: smaller protein-level differences are harder to distinguish from background variation;
- study structure: paired, longitudinal, and multi-group designs generate different numbers of observations from the same number of subjects;
- statistical objective: the planned comparison and required statistical power should guide sample planning when suitable prior or pilot information is available.
For paired and longitudinal studies, count specimens and independent subjects separately. In multi-group studies, allocate sufficient independent samples to each comparison central to the research question. For longitudinal studies, use the same collection instructions at each time point.
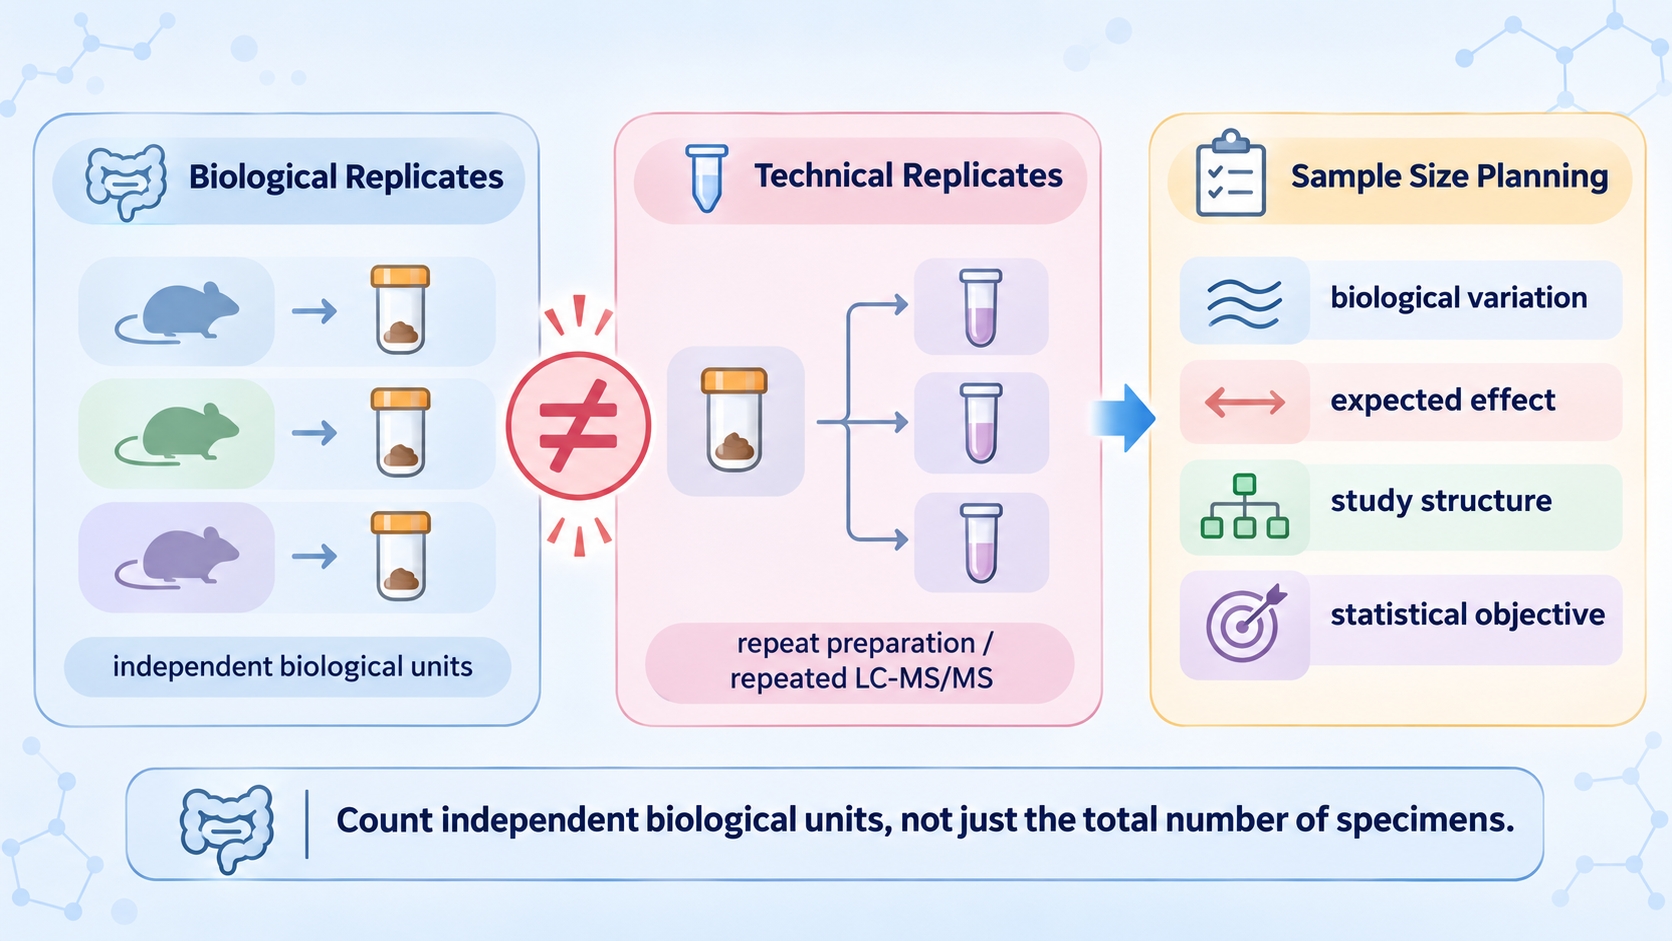
Figure 2. Distinguishing biological replicates from technical replicates and the main considerations for sample-size planning.
Select the Appropriate Proteomics Analysis Strategy
1. Match the Strategy to the Study Objective
Choose the overall strategy after defining the primary comparison, sample structure, and study scale. Exploratory projects often focus on broad protein profiling, while comparative projects place greater emphasis on relative quantification across groups. The selected strategy should provide the protein information required by the research question.
2. Select the Data Acquisition Approach
The confirmed global proteomics options include DDA, DIA, and 4D-DIA. Their use can be considered according to the study design:
- DDA: may be considered for exploratory global protein profiling and identification-focused studies.
- DIA: is well suited to comparative studies that emphasize consistent relative measurement across a defined sample set.
- 4D-DIA: can be considered when the project requires an additional separation dimension within a DIA-based workflow.
3. Select the Quantification Approach
Label-Free and TMT provide different ways to organize relative protein quantification.
- Label-Free: allows samples to be quantified across separate analytical runs and offers flexibility when sample numbers or study groups do not fit a fixed multiplex design.
- TMT: allows multiple samples to be analyzed within a coordinated multiplexed comparison and requires the group structure to be considered when samples are assigned across TMT sets.
The acquisition and quantification approaches should be selected together according to the planned comparison. MtoZ Biolabs supports DDA, DIA, 4D-DIA, Label-Free, and TMT for fecal proteomics projects, with the specific combination determined by the research objective, sample characteristics, and comparison design.
Plan Sample Distribution and Analytical Batch Organization
1. Keep Sample Collection and Handling Consistent Across Groups
Sample comparability improves when all study groups follow the same collection and handling plan. Standardize the amount of fecal material collected, the portion of the specimen sampled, collection timing relative to an intervention or study time point, and post-collection handling conditions.
For any sample collected or handled under different conditions, record the actual collection time and the specific condition for that sample. Detailed collection, storage, and transport procedures are covered in Fecal Proteomics Sample Requirements, Collection, and Handling.
2. Balance Experimental Groups Across Analytical Batches
When a study requires multiple analytical batches, distribute the major biological groups across batches. Where practical, include both disease and control samples in each batch. Balanced allocation helps distinguish biological differences from batch-related variation.
3. Plan Run Order and Placement of Linked Samples
Randomize or balance injection order across study groups to reduce position-related effects. Keep paired and longitudinal samples linked during batch planning. When feasible, place paired samples in the same batch. If paired samples are split across batches, record each assignment and retain the pairing information.
4. Keep Batch Assignments Traceable
Assign each sample a unique ID before batch allocation. Link the ID to the study group, subject or animal, biological replicate, collection date and time, and sampling time point. For paired or longitudinal studies, also record the subject ID and the relationship among repeated samples.
Record collection and handling conditions, any variation from the planned procedure, the analytical batch, and run order. Use the same metadata fields across all groups. When a sample or batch assignment changes, document the reason and update the record. These details connect the study design with the analytical run.
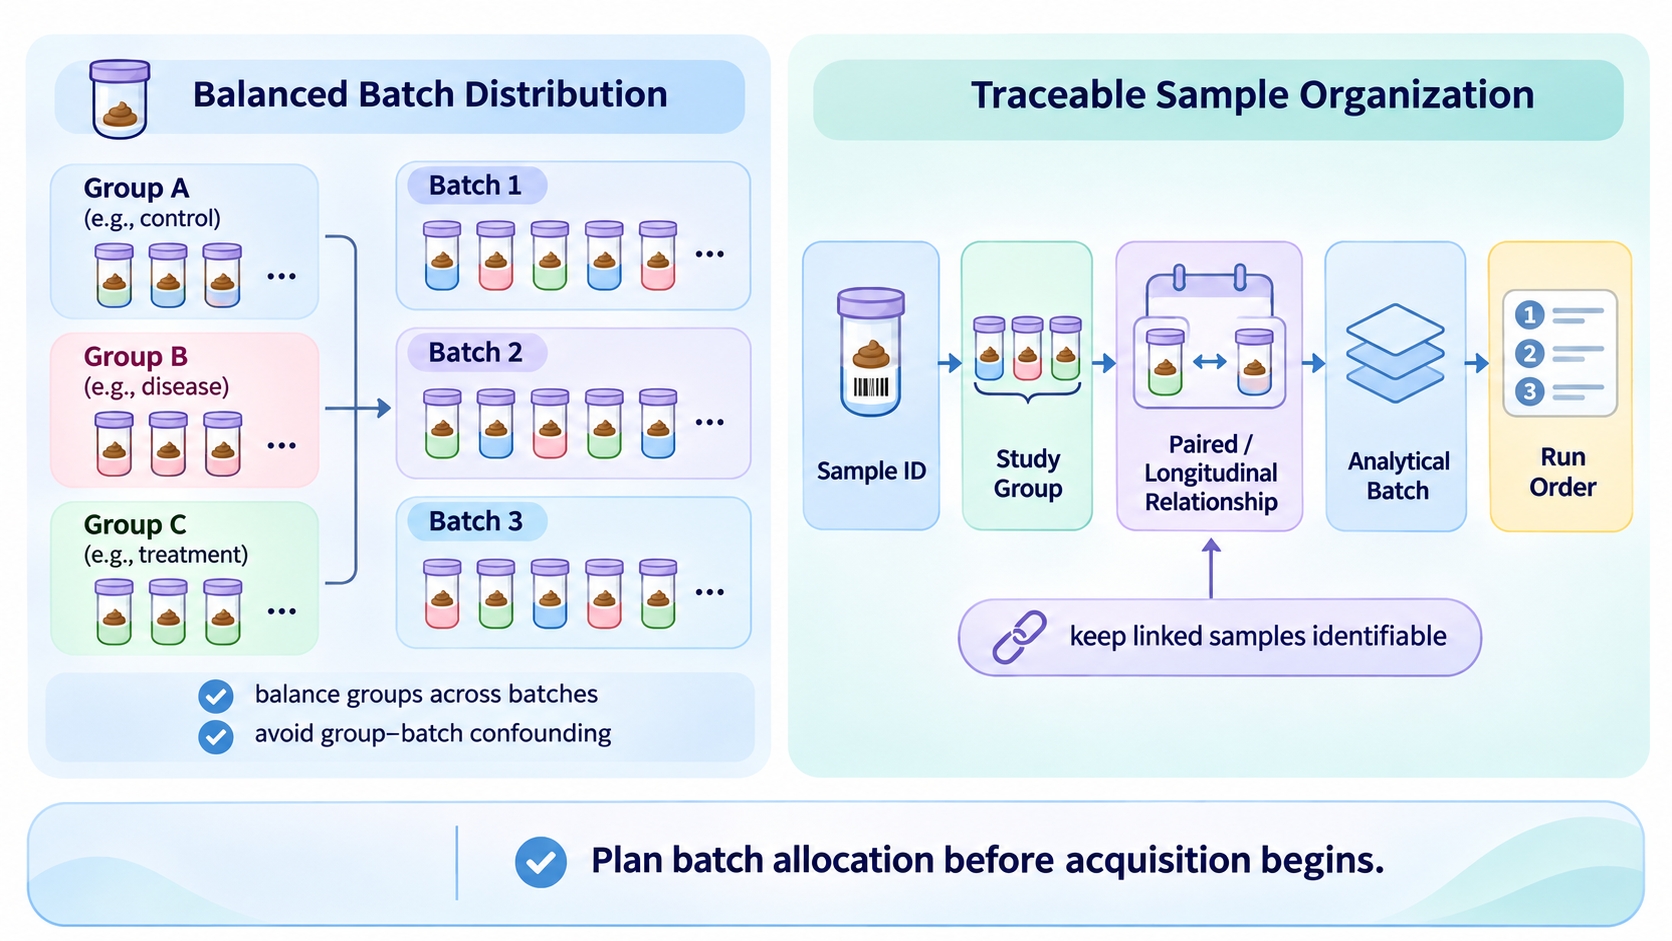
Figure 3. Balanced analytical-batch allocation and traceable sample organization in fecal proteomics studies.
Review the Overall Experimental Design
Before samples enter analysis, review the study as a complete design rather than checking each decision in isolation.
|
Design element |
Question to confirm |
|
Research question |
Is the protein-level question specific enough to define the primary comparison? |
|
Groups and reference |
Does each group represent a defined biological condition with an appropriate reference? |
|
Biological replication |
Are independent biological units distinguished from repeated measurements? |
|
Sample size |
Is the number of independent observations appropriate for the planned comparison and expected variation? |
|
Paired/longitudinal structure |
Are linked samples correctly identified and preserved in the design? |
|
Proteomics strategy |
Does the selected acquisition and quantification approach match the comparison and sample scale? |
|
Batch organization |
Are biological groups distributed so that batch and group are not completely confounded? |
Use the checklist to review collection conditions, sample relationships, and batch allocation before analysis. Summarize the primary comparison, replication structure, sample scale, selected strategy, collection plan, and batch assignments in one project record.For interpretation of protein identification, relative quantification, data quality, and differential protein results, see Fecal Proteomics Data Analysis and Interpretation.
Frequently Asked Questions
1. Can one control group be shared across multiple treatment groups?
A shared control group can support multiple treatment comparisons when all treatment groups use the same untreated or baseline condition. The control group should come from the same study population and follow the same collection schedule and handling plan. Define each treatment-versus-control comparison before analysis. Use separate reference groups when treatment groups have different baseline conditions.
2. Can pooled fecal samples be used as biological replicates?
A pooled sample combines material from multiple subjects or animals and represents one composite biological unit. Pooling reduces information about individual variation. Count each independently prepared pool as one biological replicate, and record the number of contributors as sample-composition information. If pooling is part of the study design, define each pool and its contributors before sample collection.
3. What should be done if a sample is unavailable or excluded?
Keep the original sample ID and record why the sample is unavailable or excluded. Update the number of available biological units in the affected group and check whether paired or longitudinal sample sets remain complete. Calculate the final biological replicate count from the available independent samples; record technical repeats separately.
4. Can samples from different cohorts be included in one comparison?
Samples from separate cohorts can be included when cohort differences are addressed in the study design. Record the cohort and collection period for each sample. Where practical, distribute each study group across cohorts to help distinguish cohort variation from group differences.
5. How should study-design changes be handled after sample collection begins?
Document the date and reason for each change, the affected samples, and the revised group or time-point assignment. Retain both the original and updated plans. Before combining samples collected under different plans, review whether the revised schedule and group structure still support the primary comparison.
Conclusion
A fecal proteomics experimental design should connect the research question with the primary comparison, control or reference condition, independent biological replicates, sample scale, analysis strategy, and batch organization. When these elements are planned together, the resulting protein-level comparison is easier to relate back to the original biological question. For a broader overview of fecal sample preparation, proteomics analysis, and research applications, see Fecal Proteomics: Sample Preparation, Analysis, and Applications.
Once the research question, group structure, and primary comparison are defined, MtoZ Biolabs can evaluate the appropriate analytical route through Fecal Proteomics Solutions according to the available samples and project requirements.
